Exploring roads less travelled in the cooler parts of Australia and New Zealand
Home Articles Places Categories Videos Maps About Sitemap

If you're serious about landscape and travel photography, it's easy to believe you need a lot of gear to get good photos - DSLR camera, multiple lenses and filters, sturdy tripod, etc. But what if you're also travelling light, and don't have room for all that in a single carry-on bag? Or you just prefer not to carry much? Years of lightweight travel have taught me how little you really need for good photos - allow me to make a few suggestions.
Firstly, please note that professionals who make a living from selling their photos will need more than I'm suggesting here. As will non-professionals with niche interests like diving or bird watching that require particular gear. I’m writing for the rest of us - photography enthusiasts who travel for pleasure, and take general travel/landscape photos for their own enjoyment (which may include posting online, printing enlargements, and maybe the odd sale).
Smartphone cameras are the ultimate in lightweight photography gear, and for many people they are more than good enough. However, the more serious photography enthusiast will still want a separate camera dedicated to the task. These can still provide better quality results and far greater flexibility - there is much more to a great image than just the number of megapixels. But do you really need a DSLR?
For me and many others, a DSLR - digital single lens reflex - may be overkill. They may be more capable than compact cameras, but they are also heavier and more bulky, especially with extra lenses and accessories. For active day trips and bush walks, a heavy bag of professional gear can be inconvenient and a hindrance. The less you carry the better.
So what sort of camera is best? I'm not going to refer to specific models because there are so many and they change all the time ... and no one model would suit everyone anyway. Instead I'll recommend a category of cameras: the high end compact camera.
Compact cameras - sometimes referred to as point-and-shoot cameras - are designed for portability and are usually small enough to fit into pockets. Most models shoot compressed JPG images on sensors much smaller than those in a DSLR, and lack the ability to take interchangeable lenses, filters or other accessories like external flash units. Because of these limitations they are often dismissed by enthusiasts.
But compacts are not all the same! They range from cheap and adequate up to more expensive and surprisingly good. At the upper end of this range are some models which share some of the features of DSLRs, making them a good compromise for photography enthusiasts travelling light. Even though the lenses on some of them stick out a bit. The features that set them above other compacts are:

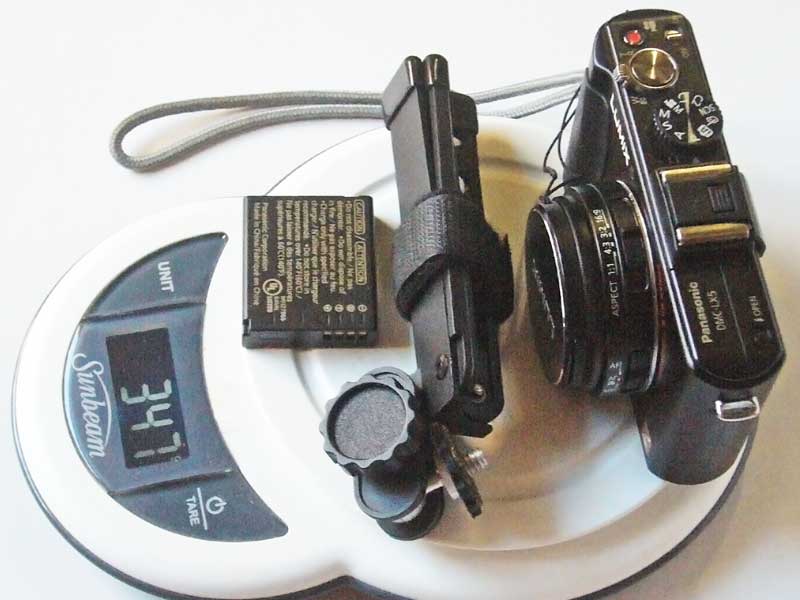
This image shows examples of relative sizes: a DSLR with extra lens (top), a budget compact (bottom left) and a high-end compact camera.
Examples of models can be found in this roundup of Best compact zoom cameras on the dpreview.com website, which is good site for reviews.
What this means for the light-travelling photographer is image quality and creative potential which can approach that of a DSLR. Any compromise made in terms of quality and flexibility - and it need not be much - may be more than made up for with the more travel-friendly small size.
But what if you're not buying a new camera, and the one you already have doesn't capture enough megapixels for big enlargements? Older compact cameras may barely have enough pixels for an A4 sized print.
I've overcome this in the past by turning the camera into portrait orientation, zooming in, and shooting several adjoining photos which cover the same area as the single photo I would otherwise have taken (see illustration). Then, in photo editing software, I join the photos together - like a panorama - to create one image with far more pixels than a single photo.
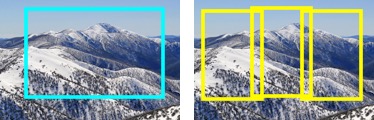
An example of zooming in for a multi-photo panorama (right)
to gain more pixels than a single photo (left)
This only works for scenes which are large enough to zoom in upon, and aren't of moving objects. Also you have to foresee the need for a large image and remember to take the extra photos - not something you'd want to do all the time. It's a compromise, but in the right circumstances, stitching together zoomed overlapping images can enable a modest compact camera to create images with as many pixels as a bigger DSLR can capture in one frame.
Any photography book or expert will emphasise the importance of using a tripod. Some means of keeping the camera perfectly still is essential for long exposures - such as at night time, in dim light, or for making flowing water look milky smooth. Even for normal daytime shots a tripod can make a difference to sharpness. But it doesn't necessarily have to be a traditional large tripod.

There are many miniature tripods available which can serve the purpose adequately for small cameras. In this case I can recommend a specific lightweight plastic type - the Ultrapod by Pedco (see photo above, or right). I've been using both small and large versions since the 1990s and have found them to be very robust and rugged.
The smaller one (10.5 cm long with the top folded down) is what I take on trips where minimum size and weight is important. It fits inside the smallest of packing cubes, which can double as a camera bag. It also fits in a pocket.
What makes these tripods especially useful are the built-in Velcro straps. They enable the camera to be strapped to handy objects like small tree branches, fence posts, railings ... or anything else that a strip of Velcro can be wrapped around. Strap it to the end of a stick, and you have a monopod! Or a selfie stick, if you really have to.
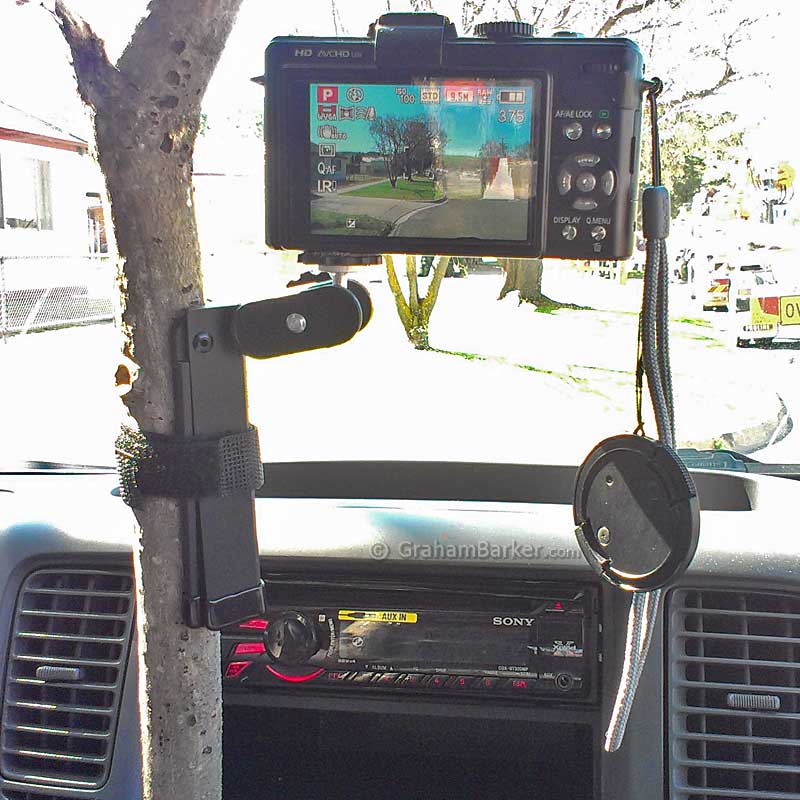
My ultrapod in use - strapped to a stick and wedged against the rear-view mirror of a campervan. That's how I shot my drivers-eye video of the Great Alpine Road when I didn't have a Gopro
Of course they can also sit on top of surfaces just like a normal tripod, only smaller. I find them so useful that even on car trips where weight is not an issue and I take a full size tripod, I’ll still take an Ultrapod was well.
These light tripods are not as sturdy as the mighty beasts used by professionals. But for non-professionals who are also lightweight travellers and have small cameras, they meet most of the functional needs with only a fraction of the inconvenience.
Whatever type of batteries power your camera, carry at least one spare. Exactly how many you need will depend on many factors, including your usage and access to electricity to recharge them. Cold weather can reduce battery life, as I learned when I used to go skiing with a video camera.
If your camera batteries or other rechargeable gadgets can be recharged from a USB socket, and you're driving a vehicle, take an adapter for the cigarette lighter socket so they can be recharged while driving.
Having a camera die in the middle of a once in a lifetime outing, or at a beauty spot you may never visit again, is a huge nuisance. It can be regretted long after ... or it can be avoided simply by having a spare battery handy at all times when travelling.
When talking of camera gear it is normal to focus on the hardware. Often overlooked is the human software, or in other words, the brain. The mental effort invested into planning and composing photos is just as important as the gear being used. Sometimes much more important!
It helps to have some photography knowledge, such as the basic rules of composition, and when to use different shutter speeds or aperture settings. Sometimes the rules (or principles) can be broken, but being aware of them - and understanding why they work - is a great foundation. Being familiar with how to use all the features of your camera also helps.
Photography sites abound on the internet, but some good starting points could include Digital Photography School, including this page of 25 Landscape Photography Tutorials, and also the collection of Photo Composition Articles at photoinf.com.
Regardless of photography knowledge, much can be gained by simply spending extra time composing photos. Sometimes a small tweak to the framing or viewpoint can make a big difference.
I've often watched people arriving at viewing platforms at scenic spots. Most will take a few quick snaps from the designated viewpoints without spending much time on it. Sometimes this will produce a great result, but more likely it will be average.
A few will linger, trying different angles and compositions, maybe straying off the path in search of interesting viewpoints. Taking a little extra time and care doesn't guarantee results above the average, but it does increase the likelihood of it.
These photos of Dip Falls in Tasmania are an example. The first is the standard view from the main part of the viewing area at the base of the falls. The second shot was the result of wandering around to find other viewpoints.
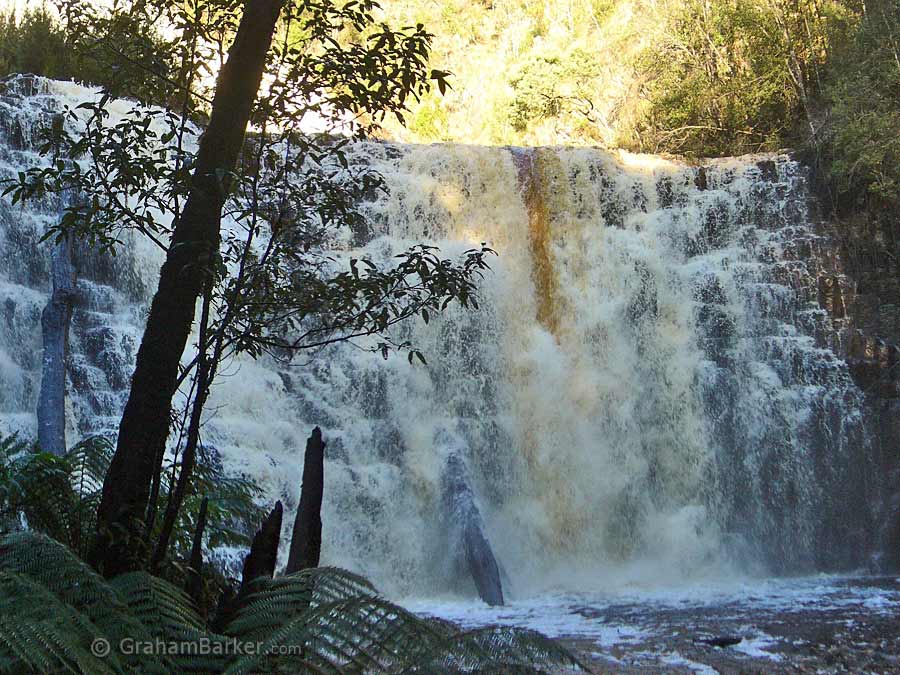
A standard quick snap at the base of Dip Falls in north west Tasmania
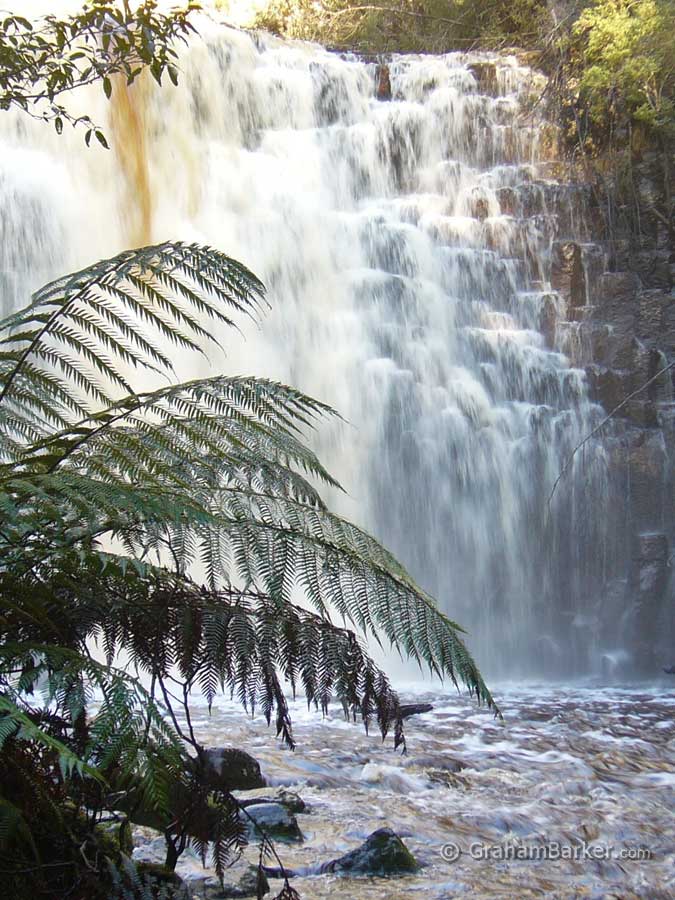
A different perspective thanks to a slightly different viewpoint with a fern in the foreground, a change to portrait format, and a slow shutter speed to blur the water.
I'd like to be clear about one thing: there’s nothing wrong with a quick snap taken from an obvious viewpoint. Lookouts and viewing areas are usually positioned where they are to highlight a good view. But getting photos that are different, or better, usually requires exploring beyond the obvious.
Another useful mental skill is anticipating a scene which might arise, or a view which might look special in the right sort of light, and then planning to be in the right place when the time is right. As opposed to just reacting to what appears in front of you. This requires time and flexibility which can be hard to do on a tight schedule.
An example is when I visited Lake Tekapo in New Zealand. I photographed the Church of the Good Shepherd from the main visitor area, as just about every tourist does. Nothing wrong with that - it's a nice view. The first photo is one of the many I took.
With time on my side, I looked around and noticed a channel of water to one side, with accessible ground on the other side. I worked out where the sun would set, and visualised the church lit up by the warm glow of dusk and reflected in the water. I returned later and took this second shot.
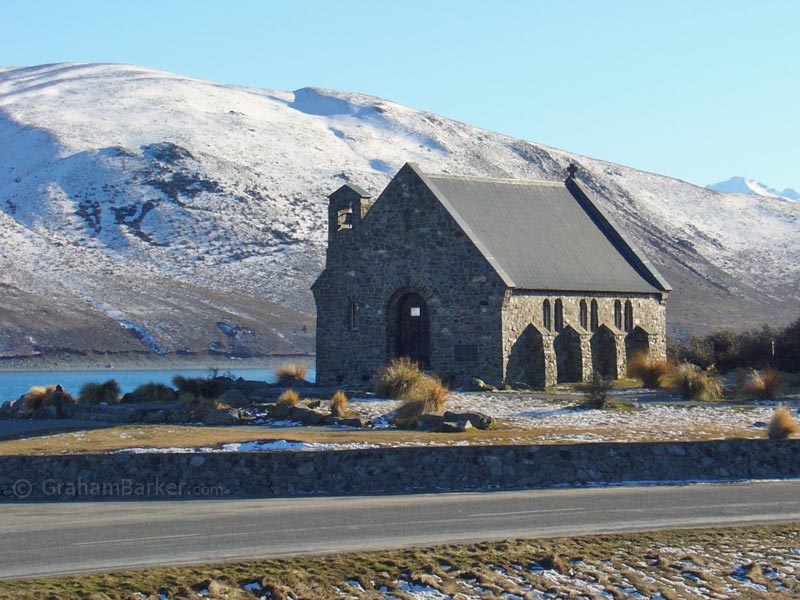
A standard view of the Church of the Good Shepherd, Lake Tekapo, New Zealand
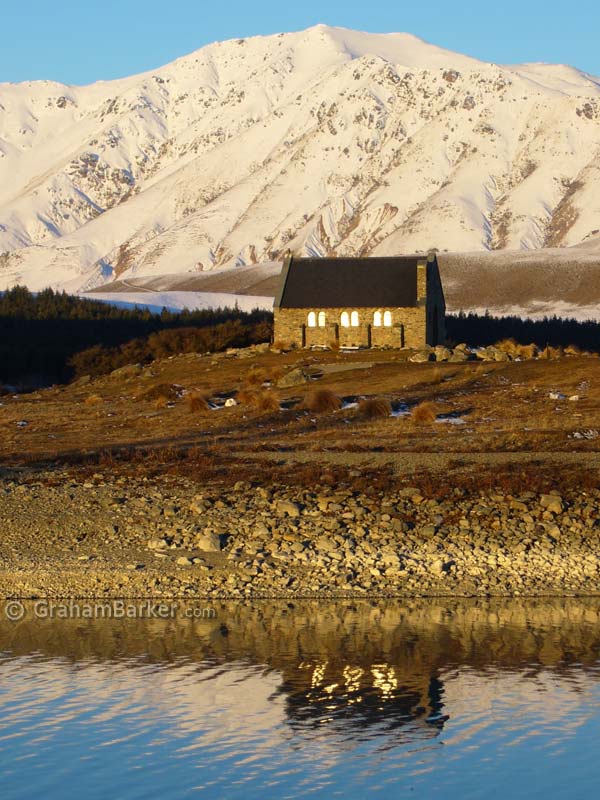
Another view from somewhere else, much later in the day
In both this example and the earlier one with the waterfall, I think the second shots are better. At least I prefer them; your opinion may differ. In both cases any improvement is the result of a little time and thought put into composing and planning - nothing to do with the size and cost of the camera.
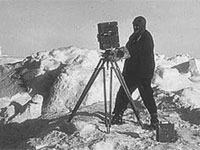
Awesome and memorable landscapes have been created throughout the history of photography, regardless of the equipment used. I like some of the classic scenes of Antarctica captured in the early 1900s by guys like Frank Hurley and Herbert Ponting. They used cumbersome equipment and processes that many would laugh at today ... and in conditions that most of us wouldn't work in. But they knew how to compose a great photo, and get the most out of what they had.
Creativity and planning can produce good photos from any reasonable bit of gear. Having better gear just makes it much easier and increases the potential.
Yes, that's all I think you really need for some great landscape and travel photos:
Even if you prefer a smartphone over a dedicated camera, the other things are still applicable. Some smartphone holders (like the ones on the end of selfie sticks) can attach to the small tripods I described. A power bank will keep your phone running longer. And a bit of thinking can always help, regardless of equipment.
Looking back over my collection, I can say that most of my best photos were taken on modest gear. And the bad or ordinary ones? In most cases, having more sophisticated equipment probably wouldn't have helped much - the shortcomings are caused by me or the conditions more than by the gear. In fact, some of my most favourite photos might not have been captured if it weren't for a small camera in my pocket.
Of course much more gear could be added to the list. Camera retailers, and the websites and magazines which rely on their advertising, will happily try to convince you that you need more stuff. But for light weight travellers wanting good results with the minimum of gear, what I've listed is enough.